What is cardiopulmonary resuscitation
Cardiopulmonary resuscitation (CPR) is a lifesaving technique useful in many emergencies, including a heart attack or near drowning, in which someone’s breathing or heartbeat has stopped. The American Heart Association recommends that everyone — untrained bystanders and medical personnel alike — begin cardiopulmonary resuscitation (CPR) with chest compressions.
It’s far better to do something than to do nothing at all if you’re fearful that your knowledge or abilities aren’t 100 percent complete. Remember, the difference between your doing something and doing nothing could be someone’s life.
Here’s advice from the American Heart Association:
- Untrained. If you’re not trained in cardiopulmonary resuscitation, then provide hands-only cardiopulmonary resuscitation (CPR). That means uninterrupted chest compressions of 100 to 120 a minute until paramedics arrive (described in more detail below). You don’t need to try rescue breathing.
- Trained and ready to go. If you’re well-trained and confident in your ability, check to see if there is a pulse and breathing. If there is no breathing or a pulse within 10 seconds, begin chest compressions. Start cardiopulmonary resuscitation with 30 chest compressions before giving two rescue breaths.
- Trained but rusty. If you’ve previously received cardiopulmonary resuscitation training but you’re not confident in your abilities, then just do chest compressions at a rate of 100 to 120 a minute.
The above advice applies to adults, children and infants needing cardiopulmonary resuscitation, but not newborns (infants up to 4 weeks old).
Cardiopulmonary resuscitation can keep oxygenated blood flowing to the brain and other vital organs until more definitive medical treatment can restore a normal heart rhythm.
When the heart stops, the lack of oxygenated blood can cause brain damage in only a few minutes. A person may die within eight to 10 minutes.
To learn cardiopulmonary resuscitation properly, take an accredited first-aid training course, including cardiopulmonary resuscitation and how to use an automated external defibrillator (AED). If you are untrained and have immediate access to a phone, call your local emergency number before beginning cardiopulmonary resuscitation. The dispatcher can instruct you in the proper procedures until help arrives.
Cardiopulmonary resuscitation steps
Before you begin
Before you starting cardiopulmonary resuscitation, check:
- Is the environment safe for the person?
- Is the person conscious or unconscious?
- If the person appears unconscious, tap or shake his or her shoulder and ask loudly, “Are you OK?”
- If the person doesn’t respond and two people are available, have one person call 911 or the local emergency number and get the automated external defibrillator (AED), if one is available, and have the other person begin cardiopulmonary resuscitation.
- If you are alone and have immediate access to a telephone, call your local emergency number before beginning cardiopulmonary resuscitation. Get the automated external defibrillator (AED), if one is available.
- As soon as an automated external defibrillator (AED) is available, deliver one shock if instructed by the device, then begin cardiopulmonary resuscitation.
Remember to spell C-A-B (compressions, airway, breathing)
The American Heart Association uses the letters C-A-B (compressions, airway, breathing) — to help people remember the order to perform the steps of cardiopulmonary resuscitation.
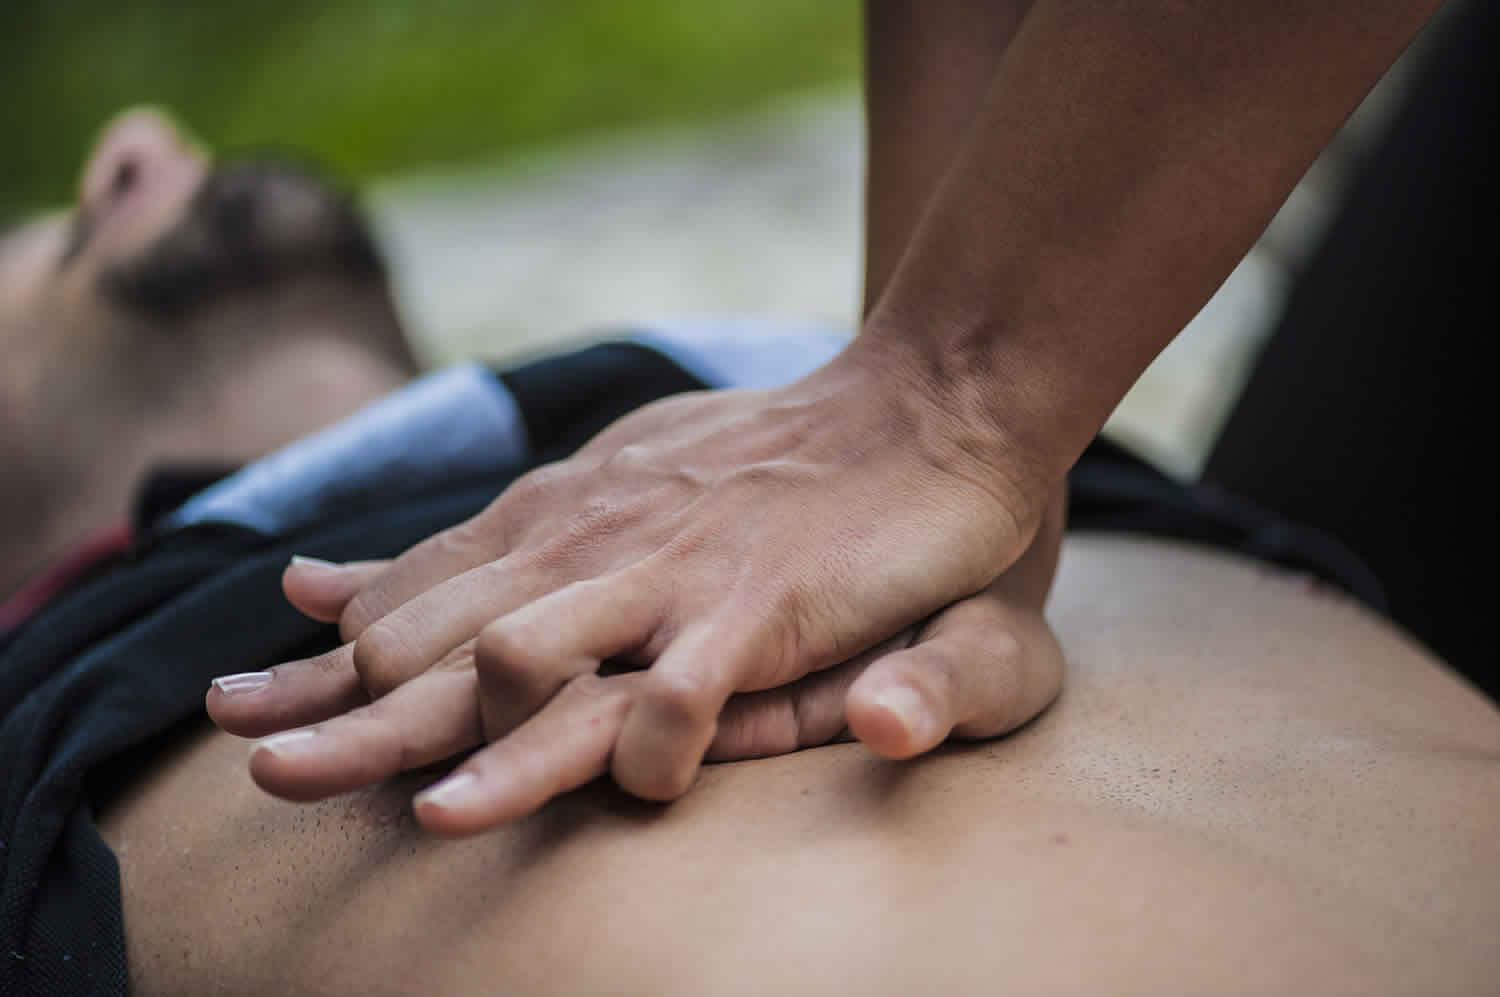
Compressions: Restore blood circulation
- Put the person on his or her back on a firm surface.
- Kneel next to the person’s neck and shoulders.
- Place the heel of one hand over the center of the person’s chest, between the nipples. Place your other hand on top of the first hand. Keep your elbows straight and position your shoulders directly above your hands.
- Use your upper body weight (not just your arms) as you push straight down on (compress) the chest at least 2 inches (approximately 5 centimeters) but not greater than 2.4 inches (approximately 6 centimeters). Push hard at a rate of 100 to 120 compressions a minute.
- If you haven’t been trained in cardiopulmonary resuscitation, continue chest compressions until there are signs of movement or until emergency medical personnel take over. If you have been trained in cardiopulmonary resuscitation, go on to opening the airway and rescue breathing.
Airway: Open the airway
- If you’re trained in cardiopulmonary resuscitation and you’ve performed 30 chest compressions, open the person’s airway using the head-tilt, chin-lift maneuver. Put your palm on the person’s forehead and gently tilt the head back. Then with the other hand, gently lift the chin forward to open the airway.
Breathing: Breathe for the person
Rescue breathing can be mouth-to-mouth breathing or mouth-to-nose breathing if the mouth is seriously injured or can’t be opened.
- With the airway open (using the head-tilt, chin-lift maneuver), pinch the nostrils shut for mouth-to-mouth breathing and cover the person’s mouth with yours, making a seal.
- Prepare to give two rescue breaths. Give the first rescue breath — lasting one second — and watch to see if the chest rises. If it does rise, give the second breath. If the chest doesn’t rise, repeat the head-tilt, chin-lift maneuver and then give the second breath. Thirty chest compressions followed by two rescue breaths is considered one cycle. Be careful not to provide too many breaths or to breathe with too much force.
- Resume chest compressions to restore circulation.
- As soon as an automated external defibrillator (AED) is available, apply it and follow the prompts. Administer one shock, then resume cardiopulmonary resuscitation — starting with chest compressions — for two more minutes before administering a second shock. If you’re not trained to use an AED, an emergency medical operator may be able to guide you in its use. If an AED isn’t available, go to step 5 below.
- Continue cardiopulmonary resuscitation until there are signs of movement or emergency medical personnel take over.
Hands-only cardiopulmonary resuscitation
To carry out a chest compression:
- Place the heel of your hand on the breastbone at the center of the person’s chest. Place your other hand on top of your first hand and interlock your fingers.
- Position yourself with your shoulders above your hands.
- Using your body weight (not just your arms), press straight down by 5-6cm (2-2.5 inches) on their chest.
- Keeping your hands on their chest, release the compression and allow the chest to return to its original position.
- Repeat these compressions at a rate of 100 to 120 times per minute until an ambulance arrives or you become exhausted.
When you call for an ambulance, telephone systems now exist that can give basic life-saving instructions, including advice about CPR. These are now common and are easily accessible with mobile phones.
Cardiopulmonary resuscitation with rescue breaths
If you’ve been trained in cardiopulmonary resuscitation, including rescue breaths, and feel confident using your skills, you should give chest compressions with rescue breaths. If you’re not completely confident, attempt hands-only CPR instead (see above).
Adults
- Place the heel of your hand on the center of the person’s chest, then place the other hand on top and press down by 5-6cm (2-2.5 inches) at a steady rate of 100 to 120 compressions per minute.
- After every 30 chest compressions, give two rescue breaths.
- Tilt the casualty’s head gently and lift the chin up with two fingers. Pinch the person’s nose. Seal your mouth over their mouth and blow steadily and firmly into their mouth for about one second. Check that their chest rises. Give two rescue breaths.
- Continue with cycles of 30 chest compressions and two rescue breaths until they begin to recover or emergency help arrives.
Cardiopulmonary resuscitation technique
Cardiopulmonary resuscitation for babies under 12 months
- Step 1: If a baby is unconscious, check her mouth for airway blockages – for example, tongue, food, vomit or blood. If there’s a blockage, use your little finger to clear it. Place baby on her back to open her airway.
- Step 2: Check for breathing. Listen for the sound of the breath, look for movements of the chest or feel for the breath on your cheek.
- Step 3: If baby is breathing, place him in the recovery position by lying him face down on your forearm. Phone your local emergency services number. Check baby regularly for breaths and responses until the ambulance arrives.
- Step 4: Position two fingers in the center of baby’s chest and give 30 compressions at a rate of about 100 to 120 compressions per minute. Each compression should depress the chest by about one third (about 1.5 inches or about 4 centimeters).
- Step 5: Tilt the baby’s head back very slightly with the chin lifted to bring the tongue away from the back of the throat, opening her airway. Take a breath and seal her mouth and nose with your mouth. Blow gently and steadily for about one second. Watch for the rise and fall of the chest. Take another breath and repeat the sequence.
- Step 6: Continue giving 30 compressions followed by 2 breaths until medical help arrives. If the child starts breathing and responding, turn her into the recovery position. Keep watching her breathing and be ready to start CPR again at any time.
Figure 1. Cardiopulmonary resuscitation for babies under 12 months

Cardiopulmonary resuscitation for for children over 1 year
- Step 1: If a child is unconscious, the first step is to check his mouth for anything blocking the airway. This could include his tongue, food, vomit or blood.
- Step 2: If you find a blockage, roll him onto his side, keeping his top leg bent. This is the recovery position. Clear blockages with your fingers, then check for breathing.
- Step 3: If you find no blockages, check for breathing and look for chest movements. Listen for breathing sounds, or feel for breath on your cheek.
- Step 4: If the child is breathing, gently roll him onto his side and into the recovery position. Phone your local emergency services number and check regularly for breathing and response until the ambulance arrives. If the child is not breathing and responding, send for help. Phone local emergency services number and start CPR: 30 chest compressions, 2 breaths (if two people are conducting CPR, give two breaths after every 15 chest compressions).
- Step 5: Put the heels of your hands in the center of the child’s chest. Using the heel of your hand, give 30 compressions (if two people are conducting CPR, give two breaths after every 15 chest compressions). Each compression should depress the chest by about one third (at least 2 inches or approximately 5 centimeters, but not greater than 2.4 inches or approximately 6 centimeters).
- Step 6: After 30 compressions, take a deep breath, seal your mouth over the child’s mouth, pinch his nose and give two steady breaths. Make sure the child’s head is tilted back to open his airway.
- Step 7: Keep giving 30 compressions then 2 breaths until medical help arrives. If the child starts breathing and responding, turn him into the recovery position. Keep watching his breathing and be ready to start CPR again at any time.
Figure 2. Cardiopulmonary resuscitation for children over 1 year


